In order to share this recipe, I must admit that we're a little obsessed with protein in this house. James is always trying to eat it to put some weight on his thin frame, and I eat a large percentage of protein to fill me up so I don't pig out on things like chocolate chip cookies (drool) and gain all my weight back.
As usual, after my run today I threw random things in the blender for a quick post-workout meal. The thing that made today different than any other day is that this was the BEST smoothie I've ever made, both health-wise and taste-wise (I'm not counting some of the impressive alcoholic concoctions I've made). It was so good, I decided it had to be added to the blog, both so I can recreate it and so you can share in the healthy yumminess.
Note: My frozen fruit was leftover after I made a fruit salad for Easter. I froze it while still fairly fresh because I had way more than I could possibly eat before it would start rotting. I found this far more cost-effective than buying bags of fruit in the freezer section at the grocery store.
Ingredients:
1 cup frozen cantaloupe
10-15 frozen green grapes (a handful)
1 cup fresh baby spinach (you won't taste it, I promise)
1 cup orange juice
1-2 scoops protein powder*
1 T ground flax seeds
Throw all ingredients in the blender and blend until the desired consistency. Enjoy immediately. The end result is about 3 cups of smoothie, almost 30 grams of protein, less than 400 calories, and a heck of a lot of vitamins. All that, and it tastes like dessert.
*I used Isopure Zero Carb Mango Peach protein mix. This and the chocolate version are staples in our cupboard. They taste great, include lots of vitamins, and dissolve better than any protein powder I've found. You don't get that powdery, gritty feeling in your mouth like most protein powders. And they don't use aspartame, which is is HUGE plus for me since it does horrible things to my body.
Monday, April 16, 2012

Saturday, April 14, 2012
Somewhat-Healthier Peanut Butter Chocolate Chip Cake
It's been a few weeks since my last post - I've still been cooking and baking, I just haven't had time to post the recipes. I had an awful migraine this week, which often means I get to eat whatever I want in an attempt to kill the headache. That resulted in this masterpiece dessert that I found on Pinterest and just had to eat immediately. I adjusted the recipe a little, making it healthier by eliminating the chocolate frosting and using fat-free Greek yogurt instead of sour cream.
 |
| *Drool* |
1 cup all-purpose flour
¼ t baking soda
¼ tsp baking powder
¼ t salt
½ stick (4 T) unsalted butter (salted is OK if that’s all you have)
3 oz. creamy peanut butter (a little less than ½ cup)
½ cup tightly packed brown sugar
1 egg
1 egg yolk
¼ cup fat-free plain Greek yogurt
¼ cup hot water
½ t vanilla extract
1 cup semi-sweet chocolate chips
Preheat oven to 325 degrees.
Combine flour, baking soda, baking powder, and salt in a bowl. I like to stir flour mixtures with a wire whisk or a fork to avoid the bad taste of chunks of baking soda in your baked goods.
In a separate bowl, cream butter, peanut butter, and brown sugar. Fun tip - if you are out of brown sugar (or if it’s solidified beyond saving like mine was), mix ½ cup white sugar plus 1 ½ tablespoons molasses in a food processor for an easy substitute.
 |
| Homemade brown sugar |
Abandon the mixer at this point, and mix in the chocolate chips using a large spoon or spatula. The original recipe only called for a ½ cup of chocolate chips, but who doesn’t want more chocolate? I used miniature chocolate chips because I had some left over from my last batch of biscotti.

Grease a 9x9 pan. I used coconut oil to grease the pan for a little extra flavor. Spread batter into pan using a spatula. Bake for at least 30 minutes, until center appears baked through. A knife inserted in the center won't help you know if it's done because the melted chocolate chips stick to the knife no matter what. Let cool for a few minutes in pan. Cut into 9 pieces and serve with whipped cream or vanilla ice cream on top.

*Note: After making this recipe once, I recommend baking it in a 13x9 pan for a shorter time - maybe 20-25 minutes. In a 9x9 pan, the center was too thick and not completely baked while the edges were starting to burn.
 |
| Yum! |
http://www.culinaryconcoctionsbypeabody.com/2006/10/01/life-can-be-cruel/
Wednesday, March 21, 2012
Cheddar & Garlic Biscuits
A few weeks ago, I took a break from creativity for the night and made some very cheesy cheddar biscuits out of a box. I ate one biscuit with my dinner, and left them sitting out on the counter when I went to bed that night. When I woke, the biscuits were gone... and my boyfriend had all sorts of creative excuses for how they disappeared, finally admitting that they were so good that he couldn't help but eat them all.


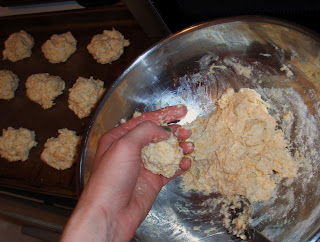

Unfortunately, that yummy biscuit mix was kind of expensive, so I set out to find a recipe so I could make them from scratch. After much research, I finally settled on this recipe that I found on Pinterest. James agrees they taste just as delicious as the ones that came from a box, and they barely cost me anything to make.

This recipe is definitely a keeper. I plan on freezing half of it to ensure there are some left when I wake up tomorrow.
Ingredients:
2 cups all-purpose flour
1 T baking powder
1/4 t garlic powder
1/2 t salt
5 T butter, cold
1 cup buttermilk*
1 1/4 cups grated sharp cheddar cheese (or more, if you like!)
*The original recipe advises that if you don't have buttermilk, mix one cup milk with 1 1/2 teaspoons vinegar and let sit for ten minutes before using. I did this, and my biscuits turned out fine.
Butter topping:
2 T butter, melted
1/4 t dried parsley
3/4 t garlic powder
Dash of salt
Preheat oven to 425 degrees. Mix dry ingredients (first 4 ingredients) well in a large bowl. Add cold butter and cut into dry ingredients until mixture is crumbly and no large chunks of butter are visible.

Mix in grated cheese. Add buttermilk and stir minimally; over-mixing will effect the final texture of the biscuits. Using your hands and a soup spoon, drop golf-ball sized chunks of dough onto a non-stick baking sheet, again handling the dough minimally.

Bake biscuits at 425 degrees for 10-12 minutes. While the biscuits are baking, mix the butter topping so it is ready when the biscuits come out of the oven. Remove biscuits from tray to a cooling rack and immediately brush with melted butter and spice mixture. These biscuits taste great still warm from the oven. Makes 18 biscuits.

Banana Nut Muffins
I am the queen of forgetting that I bought bananas. I have such good intentions in the grocery store, and then I get home and the poor bananas lay on the kitchen table, slowly rotting, turning black, and eventually attracting fruit flies. Thanks to this bad habit of mine, this recipe for banana nut bread or muffins has become one of my favorites. This was adapted from my 93-year old grandma's recipe, which originally called for "oleo" and definitely did not include whole wheat flour.

Ingredients:
Group One:
½ cup all-purpose flour
½ cup whole wheat flour
2 t baking powder
1 t baking soda
1 t salt
1 ½ cups chopped walnuts
Group Two:
2/3 cup brown sugar
1/3 cup canola oil
2 eggs
2 mashed ripe bananas
Preheat oven to 350 degrees. Combine group one ingredients and set aside. Cream sugar and oil together in a bowl. Add eggs and beat well. Add bananas, then flour-nut mixture, and beat until smooth. Lightly coat a muffin tin with non-stick spray or oil. Bake for 10-15 minutes at 350 degrees. My oven runs hot, so they were definitely done after 10 minutes in my kitchen. Allow muffins to cool on a rack.


Ingredients:
Group One:
½ cup all-purpose flour
½ cup whole wheat flour
2 t baking powder
1 t baking soda
1 t salt
1 ½ cups chopped walnuts
Group Two:
2/3 cup brown sugar
1/3 cup canola oil
2 eggs
2 mashed ripe bananas
Preheat oven to 350 degrees. Combine group one ingredients and set aside. Cream sugar and oil together in a bowl. Add eggs and beat well. Add bananas, then flour-nut mixture, and beat until smooth. Lightly coat a muffin tin with non-stick spray or oil. Bake for 10-15 minutes at 350 degrees. My oven runs hot, so they were definitely done after 10 minutes in my kitchen. Allow muffins to cool on a rack.
If you would prefer to make bread instead of muffins, pour mixture into a greased loaf pan and bake for an hour at 350 degrees.
**A tip for "chopped" walnuts: When I first made this recipe, I would end up with pieces of walnuts flying all over the kitchen as I attempted to chop them on the cutting board. I searched for years for a nut grinder comparable to the one my mom had when I was younger, and was thrilled when I finally found this at Bed, Bath, and Beyond:

If you like walnuts and use them often, this is a very handy tool to have in your kitchen. I put ground nuts on and in a LOT of things now that it's this easy
Caramel Apple Wine Float
It's been a busy few weeks, and I have a lot of blogging to catch up on tonight! Last winter I went on a tour of local wineries with a few friends for Valentine's Day. One of my favorite Northeast Ohio wineries by far is Emerine Estates (http://www.emerineestates.com/), a small, unimpressive looking place in Jefferson, Ohio. Despite the wood paneling and plain decor, this tiny winery has some of the best wine I've ever tasted.
A year later, the only Emerine wine left in my collection was a caramel apple wine. I remembered when I first tasted this wine, I really wanted some vanilla ice cream with it. This was the inspiration for this amazing ice cream float.

A year later, the only Emerine wine left in my collection was a caramel apple wine. I remembered when I first tasted this wine, I really wanted some vanilla ice cream with it. This was the inspiration for this amazing ice cream float.

I know this isn't really a recipe (it's just a really good vanilla ice cream with wine poured over it), but if you have access to a caramel apple wine, you have to try this! It was so good I made two. Thank God I ran out of ice cream or I might have had to make more.
Friday, March 9, 2012
Black Bean and Quinoa Burgers
As I was about to make some boring quinoa and veggies for lunch, this recipe on the Trader Joe's quinoa package caught my eye. I realized quickly that I had most of the ingredients involved, and decided to try it. Deliciousness ensued. Here is my slightly altered version of their recipe.

Ingredients:
1 cup dry quinoa
2 cups vegetable broth
Olive oil
1 large red pepper, diced
2 cloves garlic, minced
1/4 cup diced onions or shallots
1 can black beans
1 cup bread crumbs
1/2 t salt
1/2 t pepper
Bring 2 cups vegetable broth to boil. Add quinoa, reduce heat, and simmer for 10-15 minutes or until all liquid is aborbed.
While the quinoa is cooking, dice the onion and pepper. I chose to be lazy today and just used the food processor. Heat 2-3 tablespoons olive oil in the skillet, and sauté onions, red pepper, and garlic until soft. Remove from heat and allow to cool.
Drain and rinse one can black beans in a strainer or colander, rinsing until water runs clear. Coarsely chop the black beans in a food processor. Combine cooked onions, red pepper, garlic, and chopped beans in a mixing bowl. Add cooked quinoa, bread crumbs, salt and pepper, and mix well. Allow to cool until you feel comfortable handling the mixture with your hands.

Line two baking sheets with wax paper. Using your hands and a spatula or large spoon, scoop up about a handful of the mixture and form into a ball, about the size of a large meatball. Drop the ball onto the wax paper and flatten carefully with your hands, making a patty about 3/4" to an inch thick. Continue until all mixture has been used (makes about 10 patties).
Place baking trays in refrigerator and chill the patties for 10 minutes. When patties are cool, drizzle about 2-3 tablespoons of olive oil in a skillet and heat on medium-high heat. When hot, cook patties about 5 minutes per side in skillet, until each side is browned.

Cook only as many patties as you plan on eating for this meal. Remaining patties can be refrigerated or frozen, stacked 3-4 patties high with wax paper in between in an airtight container.

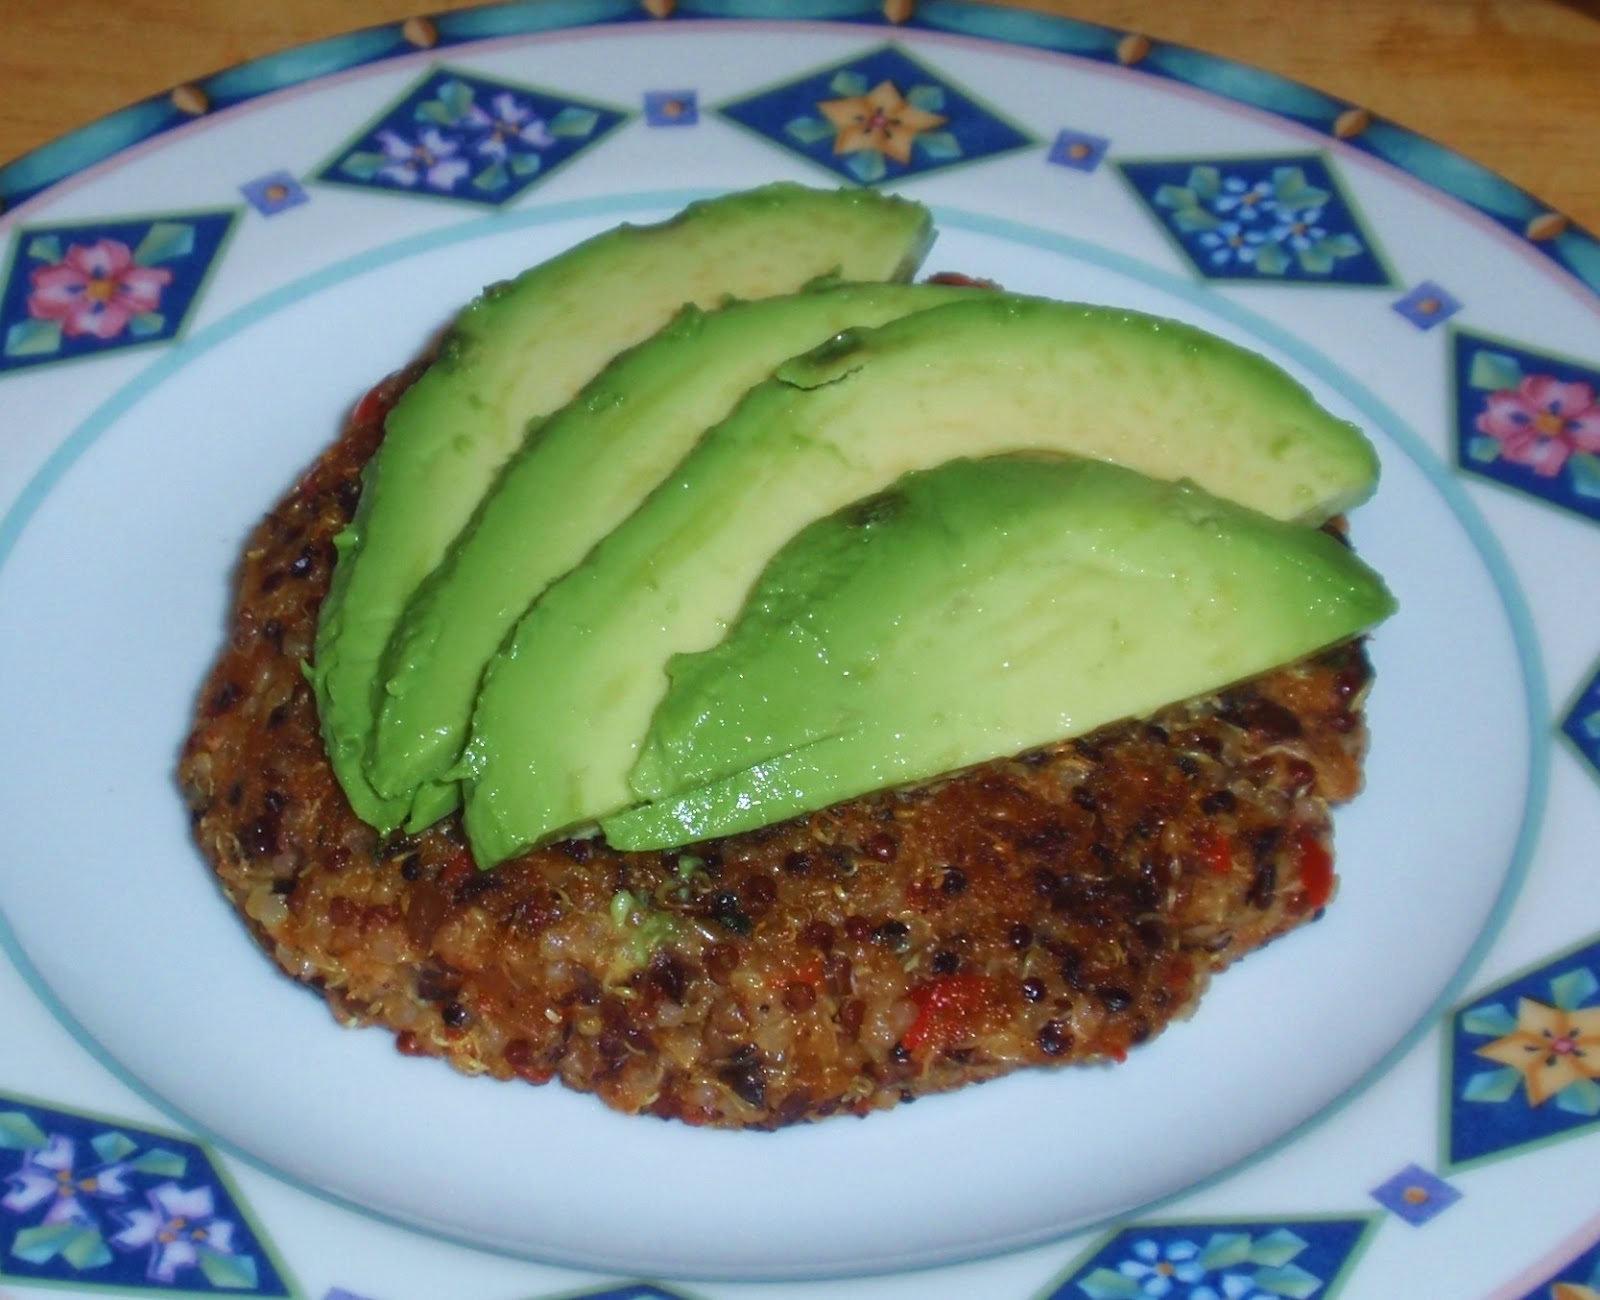
I recommend serving these burgers either bread-free with avocado slices on top, or as a sandwich with toasted bread, mayonnaise, and sliced avocados or guacamole.


Ingredients:
1 cup dry quinoa
2 cups vegetable broth
Olive oil
1 large red pepper, diced
2 cloves garlic, minced
1/4 cup diced onions or shallots
1 can black beans
1 cup bread crumbs
1/2 t salt
1/2 t pepper
Bring 2 cups vegetable broth to boil. Add quinoa, reduce heat, and simmer for 10-15 minutes or until all liquid is aborbed.
While the quinoa is cooking, dice the onion and pepper. I chose to be lazy today and just used the food processor. Heat 2-3 tablespoons olive oil in the skillet, and sauté onions, red pepper, and garlic until soft. Remove from heat and allow to cool.
Drain and rinse one can black beans in a strainer or colander, rinsing until water runs clear. Coarsely chop the black beans in a food processor. Combine cooked onions, red pepper, garlic, and chopped beans in a mixing bowl. Add cooked quinoa, bread crumbs, salt and pepper, and mix well. Allow to cool until you feel comfortable handling the mixture with your hands.

Line two baking sheets with wax paper. Using your hands and a spatula or large spoon, scoop up about a handful of the mixture and form into a ball, about the size of a large meatball. Drop the ball onto the wax paper and flatten carefully with your hands, making a patty about 3/4" to an inch thick. Continue until all mixture has been used (makes about 10 patties).
Place baking trays in refrigerator and chill the patties for 10 minutes. When patties are cool, drizzle about 2-3 tablespoons of olive oil in a skillet and heat on medium-high heat. When hot, cook patties about 5 minutes per side in skillet, until each side is browned.

Cook only as many patties as you plan on eating for this meal. Remaining patties can be refrigerated or frozen, stacked 3-4 patties high with wax paper in between in an airtight container.

I recommend serving these burgers either bread-free with avocado slices on top, or as a sandwich with toasted bread, mayonnaise, and sliced avocados or guacamole.
Saturday, March 3, 2012
Crispy Sweet Potato Fries
I have been attempting to make crispy sweet potato fries in the oven for probably about 6 months now, and have failed miserably every time. I usually end up with mushy fries that are stuck to the pan/foil. This recipe, inspired by a recipe I found on Pinterest, was amazingly crispy and delicious.
Ingredients:
1 sweet potato
2 T all-purpose flour
1/2 t sea salt
1/2 t black pepper
1/2 cup egg beaters (or two eggs, beaten)
1 cup bread crumbs
Preheat oven to 425 degrees. Peel sweet potato and slice into fry-sized pieces. Combine flour, salt, pepper, and sweet potato pieces in a gallon-size plastic bag. Seal bag and shake until all pieces of sweet potato are covered in flour and spice mixture.
Prepare an assembly line with eggs in one shallow bowl, bread crumbs in another shallow bowl, and a large cookie sheet lined with aluminum fail and generously sprayed with cooking spray.


Ingredients:
1 sweet potato
2 T all-purpose flour
1/2 t sea salt
1/2 t black pepper
1/2 cup egg beaters (or two eggs, beaten)
1 cup bread crumbs
Preheat oven to 425 degrees. Peel sweet potato and slice into fry-sized pieces. Combine flour, salt, pepper, and sweet potato pieces in a gallon-size plastic bag. Seal bag and shake until all pieces of sweet potato are covered in flour and spice mixture.
Prepare an assembly line with eggs in one shallow bowl, bread crumbs in another shallow bowl, and a large cookie sheet lined with aluminum fail and generously sprayed with cooking spray.

Taking each fry one at a time, dip a flour-coated fry in the eggs, then roll in bread crumbs until coated, and place on baking tray. Continue until all pieces are covered in bread crumbs.

Cook at 425 degrees for 17 minutes. I served these fries with a cilantro-chive yogurt dip from Trader Joe's as a great rainy-afternoon snack. One sweet potato is enough to serve two people.
References:
Subscribe to:
Posts (Atom)