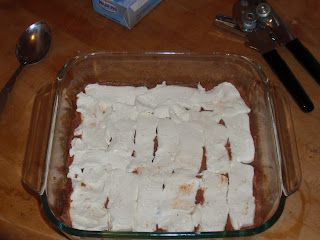
Wednesday, March 21, 2012

Cheddar & Garlic Biscuits

A few weeks ago, I took a break from creativity for the night and made some very cheesy cheddar biscuits out of a box. I ate one biscuit with my dinner, and left them sitting out on the counter when I went to bed that night. When I woke, the biscuits were gone... and my boyfriend had all sorts of creative excuses for how they disappeared, finally admitting that they were so good that he couldn't help but eat them all.

Unfortunately, that yummy biscuit mix was kind of expensive, so I set out to find a recipe so I could make them from scratch. After much research, I finally settled on this recipe that I found on Pinterest. James agrees they taste just as delicious as the ones that came from a box, and they barely cost me anything to make.


This recipe is definitely a keeper. I plan on freezing half of it to ensure there are some left when I wake up tomorrow.

Ingredients:

2 cups all-purpose flour
1 T baking powder
1/4 t garlic powder
1/2 t salt
5 T butter, cold
1 cup buttermilk*
1 1/4 cups grated sharp cheddar cheese (or more, if you like!)

*The original recipe advises that if you don't have buttermilk, mix one cup milk with 1 1/2 teaspoons vinegar and let sit for ten minutes before using. I did this, and my biscuits turned out fine.

Butter topping:
2 T butter, melted
1/4 t dried parsley
3/4 t garlic powder
Dash of salt

Preheat oven to 425 degrees. Mix dry ingredients (first 4 ingredients) well in a large bowl. Add cold butter and cut into dry ingredients until mixture is crumbly and no large chunks of butter are visible.


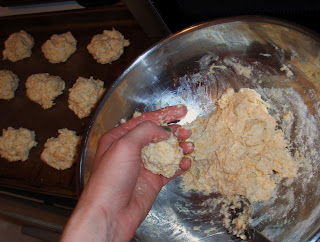
Mix in grated cheese. Add buttermilk and stir minimally; over-mixing will effect the final texture of the biscuits. Using your hands and a soup spoon, drop golf-ball sized chunks of dough onto a non-stick baking sheet, again handling the dough minimally.


Bake biscuits at 425 degrees for 10-12 minutes. While the biscuits are baking, mix the butter topping so it is ready when the biscuits come out of the oven. Remove biscuits from tray to a cooling rack and immediately brush with melted butter and spice mixture. These biscuits taste great still warm from the oven. Makes 18 biscuits.


Banana Nut Muffins

I am the queen of forgetting that I bought bananas. I have such good intentions in the grocery store, and then I get home and the poor bananas lay on the kitchen table, slowly rotting, turning black, and eventually attracting fruit flies. Thanks to this bad habit of mine, this recipe for banana nut bread or muffins has become one of my favorites. This was adapted from my 93-year old grandma's recipe, which originally called for "oleo" and definitely did not include whole wheat flour.


Ingredients:


Group One:
½ cup all-purpose flour
½ cup whole wheat flour
2 t baking powder
1 t baking soda
1 t salt
1 ½ cups chopped walnuts


Group Two:
2/3 cup brown sugar
1/3 cup canola oil
2 eggs
2 mashed ripe bananas


Preheat oven to 350 degrees. Combine group one ingredients and set aside. Cream sugar and oil together in a bowl. Add eggs and beat well. Add bananas, then flour-nut mixture, and beat until smooth. Lightly coat a muffin tin with non-stick spray or oil. Bake for 10-15 minutes at 350 degrees. My oven runs hot, so they were definitely done after 10 minutes in my kitchen. Allow muffins to cool on a rack.

If you would prefer to make bread instead of muffins, pour mixture into a greased loaf pan and bake for an hour at 350 degrees.

**A tip for "chopped" walnuts: When I first made this recipe, I would end up with pieces of walnuts flying all over the kitchen as I attempted to chop them on the cutting board. I searched for years for a nut grinder comparable to the one my mom had when I was younger, and was thrilled when I finally found this at Bed, Bath, and Beyond:


If you like walnuts and use them often, this is a very handy tool to have in your kitchen. I put ground nuts on and in a LOT of things now that it's this easy

Caramel Apple Wine Float

It's been a busy few weeks, and I have a lot of blogging to catch up on tonight! Last winter I went on a tour of local wineries with a few friends for Valentine's Day. One of my favorite Northeast Ohio wineries by far is Emerine Estates (http://www.emerineestates.com/), a small, unimpressive looking place in Jefferson, Ohio. Despite the wood paneling and plain decor, this tiny winery has some of the best wine I've ever tasted.


A year later, the only Emerine wine left in my collection was a caramel apple wine. I remembered when I first tasted this wine, I really wanted some vanilla ice cream with it. This was the inspiration for this amazing ice cream float.


I know this isn't really a recipe (it's just a really good vanilla ice cream with wine poured over it), but if you have access to a caramel apple wine, you have to try this! It was so good I made two. Thank God I ran out of ice cream or I might have had to make more.

Friday, March 9, 2012

Black Bean and Quinoa Burgers

As I was about to make some boring quinoa and veggies for lunch, this recipe on the Trader Joe's quinoa package caught my eye. I realized quickly that I had most of the ingredients involved, and decided to try it. Deliciousness ensued. Here is my slightly altered version of their recipe.


Ingredients:

1 cup dry quinoa
2 cups vegetable broth
Olive oil
1 large red pepper, diced
2 cloves garlic, minced
1/4 cup diced onions or shallots
1 can black beans
1 cup bread crumbs
1/2 t salt
1/2 t pepper


Bring 2 cups vegetable broth to boil. Add quinoa, reduce heat, and simmer for 10-15 minutes or until all liquid is aborbed.


While the quinoa is cooking, dice the onion and pepper. I chose to be lazy today and just used the food processor. Heat 2-3 tablespoons olive oil in the skillet, and sauté onions, red pepper, and garlic until soft. Remove from heat and allow to cool.


Drain and rinse one can black beans in a strainer or colander, rinsing until water runs clear. Coarsely chop the black beans in a food processor. Combine cooked onions, red pepper, garlic, and chopped beans in a mixing bowl. Add cooked quinoa, bread crumbs, salt and pepper, and mix well. Allow to cool until you feel comfortable handling the mixture with your hands.


Line two baking sheets with wax paper. Using your hands and a spatula or large spoon, scoop up about a handful of the mixture and form into a ball, about the size of a large meatball. Drop the ball onto the wax paper and flatten carefully with your hands, making a patty about 3/4" to an inch thick. Continue until all mixture has been used (makes about 10 patties).


Place baking trays in refrigerator and chill the patties for 10 minutes. When patties are cool, drizzle about 2-3 tablespoons of olive oil in a skillet and heat on medium-high heat. When hot, cook patties about 5 minutes per side in skillet, until each side is browned.


Cook only as many patties as you plan on eating for this meal. Remaining patties can be refrigerated or frozen, stacked 3-4 patties high with wax paper in between in an airtight container.


I recommend serving these burgers either bread-free with avocado slices on top, or as a sandwich with toasted bread, mayonnaise, and sliced avocados or guacamole.


Saturday, March 3, 2012

Crispy Sweet Potato Fries

I have been attempting to make crispy sweet potato fries in the oven for probably about 6 months now, and have failed miserably every time. I usually end up with mushy fries that are stuck to the pan/foil. This recipe, inspired by a recipe I found on Pinterest, was amazingly crispy and delicious.


Ingredients:


1 sweet potato
2 T all-purpose flour
1/2 t sea salt
1/2 t black pepper
1/2 cup egg beaters (or two eggs, beaten)
1 cup bread crumbs


Preheat oven to 425 degrees. Peel sweet potato and slice into fry-sized pieces. Combine flour, salt, pepper, and sweet potato pieces in a gallon-size plastic bag. Seal bag and shake until all pieces of sweet potato are covered in flour and spice mixture.


Prepare an assembly line with eggs in one shallow bowl, bread crumbs in another shallow bowl, and a large cookie sheet lined with aluminum fail and generously sprayed with cooking spray.


Taking each fry one at a time, dip a flour-coated fry in the eggs, then roll in bread crumbs until coated, and place on baking tray. Continue until all pieces are covered in bread crumbs.


Cook at 425 degrees for 17 minutes. I served these fries with a cilantro-chive yogurt dip from Trader Joe's as a great rainy-afternoon snack. One sweet potato is enough to serve two people.

References:

Easy Cheesy Spinach and Pasta

This was a very easy Friday-night dinner that I was able to throw together quickly after a week of working overtime. This is definitely going to become a staple in my diet.


Ingredients:

1 T butter
1 T olive oil
2 t minced garlic
1/2 white onion, diced
1/2 cup fresh parsley, diced
1/2 lb frozen spinach
1 14-oz box mini shell pasta ("conchigle")
1/2 cup sour cream or plain greek yogurt
1/4-lb Italian grated cheese mix
1/2 t sea salt
1/2 t black pepper
1 packet Knorr pesto mix

Preheat oven to 350 degrees. Fill large, deep saucepan halfway with water. Add a few dashes of salt and bring to boil. Add entire box of pasta to boiling water and cook until al dente - just a little chewy. Drain pasta and remove to separate bowl.

In same saucepan (now empty), melt butter with olive oil over medium heat. Add minced garlic and cook for a minute or two, stirring often. Add onions and parsley and continue cooking until onions are soft and beginning to look clear.

Pretty!
Mix in frozen spinach, cover, and cook, stirring often, until spinach is thawed and and mixing easily with onions and parsley. Be careful not to overcook the spinach, as it is chock full of vitamins that break down the longer you cook it. When spinach is thawed, mix in salt, pepper, and pesto packet. Turn off heat and mix in sour cream (or yogurt)m pasta, and half of the grated cheese. Mix well until pasta is uniformly covered in veggies and sauce.

Grease a 13x9 pan with a small amount of olive oil. Pour cheesy pasta mixture into pan, spreading with a spatula to fill the pan. Crumble remaining cheese on top of pasta, trying to create an even layer of cheese. Bake at 350 degrees for 20 minutes. Let cool for a few minutes in pan before serving.


Fail-afel

When I decided to go temporarily vegetarian, the recipe I was most looking forward to trying was falafel. A local restaurant makes excellent falafel, and it looks really easy to make when you look at the recipes. Just throw a bunch of stuff in the food processor, make patties, and fry them in a pan - what could be easier than that?


I was so, so wrong. Sure, the food processor part was easy:


Ooooo pretty
At this point I was feeling pretty confident. The mixture came out of the food processor tasting great. The composition was the problem - the batter was REALLY wet and hard to form into patties. So I tried this, thinking it was a genius idea:

Fail-afel muffins!
...and I tried this - making falafel-balls in my hands and slamming them onto a cookie sheet to make patties (which was a LOT of fun!):


Both efforts failed miserably. When I attempted to remove them from the muffin tin/cookie sheet, they completely fell apart because the middle was so soft. I salvaged what I could, and tried the more traditional pan-frying method with what was left.


These looked authentic, but still completely fell apart on removal from the pan, as the middle was still completely soft. Even the fried outsides were deceptively un-crispy. I ate a few of them with some store-bought yogurt sauce, but they were mushy and awful. I'm sorry to say, most of the results of this effort ended up in the trash.

I have some ideas for how to make this recipe better and will be trying it again in the future. If I ever successfully make falafel, I promise to post the recipe. In the meantime, any suggestions are greatly appreciated.

Vegetarian Taco Dip - A Night at the Oscars

Last Sunday I attended an Oscar-watching party that had multiple vegetarians on the guest list. The host planned an all-vegetarian menu for the occasion. I took this as the perfect opportunity to try out this vegetarian taco dip recipe, originally obtained from a good friend and former coworker.

You can substitute a pound of cooked ground beef instead of veggie crumbles if the word "vegetarian" scares you, but I promise this tastes amazing without the meat. To quote my meat-eating boyfriend, "If you hadn't told me this was vegetarian, I never would have known." He encouraged me to make this recipe as often as possible. Other party attendees were big fans of this dip as well.


Ingredients:

1 12-oz package Morning Star Veggie Crumbles
1 package taco seasoning (I used Trader Joes brand)
1 16-oz can vegetarian refried beans ("Fat free" often means vegetarian in this product)
1 8-oz package reduced fat cream cheese (freeze for 15-20 minutes)
1 16-oz jar of mild salsa
1 small can sliced black olives
1 small jar sliced jalapenos
1 bag Mexican grated cheese blend
Olive oil

Preheat oven to 350 degrees. Heat 1 T olive oil in a frying pan over medium heat. Add frozen veggie crumblers, cooking over medium heat until hot and cooked all the way through. Stir often to prevent burning. Remove from heat and mix in the packet of taco seasoning. Feel free to add hot sauce or chili powder if you really like extra heat.

Grease a 9x9 pan with a very small amount of olive oil. Spread refried beans in bottom of pan, using a spatula or spoon to form an even layer. Remove cream cheese from freezer and slice into thin slices (about 1/4 inch). Place these slices on top of the beans, trying to create a full layer of cream cheese.


Spread the whole jar of salsa on top of the cream cheese, again using a spoon or spatula to create an even layer. Spread the seasoned veggie crumblers on top of the salsa. 

Arrange slices of olives and jalapenos as the next layer, keeping in mind how spicy jalapenos (don't go overboard!). I like to chop the jalepenos into smaller pieces to spare party guests from a shockingly spicy bite. Sprinkle grated Mexican cheese on top, using as much cheese as you want.


Bake for 350 degrees for 30 minutes. This dip is best served warm with tortilla chips.