Saturday, March 3, 2012

Easy Cheesy Spinach and Pasta

This was a very easy Friday-night dinner that I was able to throw together quickly after a week of working overtime. This is definitely going to become a staple in my diet.


Ingredients:

1 T butter
1 T olive oil
2 t minced garlic
1/2 white onion, diced
1/2 cup fresh parsley, diced
1/2 lb frozen spinach
1 14-oz box mini shell pasta ("conchigle")
1/2 cup sour cream or plain greek yogurt
1/4-lb Italian grated cheese mix
1/2 t sea salt
1/2 t black pepper
1 packet Knorr pesto mix

Preheat oven to 350 degrees. Fill large, deep saucepan halfway with water. Add a few dashes of salt and bring to boil. Add entire box of pasta to boiling water and cook until al dente - just a little chewy. Drain pasta and remove to separate bowl.

In same saucepan (now empty), melt butter with olive oil over medium heat. Add minced garlic and cook for a minute or two, stirring often. Add onions and parsley and continue cooking until onions are soft and beginning to look clear.

Pretty!
Mix in frozen spinach, cover, and cook, stirring often, until spinach is thawed and and mixing easily with onions and parsley. Be careful not to overcook the spinach, as it is chock full of vitamins that break down the longer you cook it. When spinach is thawed, mix in salt, pepper, and pesto packet. Turn off heat and mix in sour cream (or yogurt)m pasta, and half of the grated cheese. Mix well until pasta is uniformly covered in veggies and sauce.

Grease a 13x9 pan with a small amount of olive oil. Pour cheesy pasta mixture into pan, spreading with a spatula to fill the pan. Crumble remaining cheese on top of pasta, trying to create an even layer of cheese. Bake at 350 degrees for 20 minutes. Let cool for a few minutes in pan before serving.


Fail-afel

When I decided to go temporarily vegetarian, the recipe I was most looking forward to trying was falafel. A local restaurant makes excellent falafel, and it looks really easy to make when you look at the recipes. Just throw a bunch of stuff in the food processor, make patties, and fry them in a pan - what could be easier than that?


I was so, so wrong. Sure, the food processor part was easy:


Ooooo pretty
At this point I was feeling pretty confident. The mixture came out of the food processor tasting great. The composition was the problem - the batter was REALLY wet and hard to form into patties. So I tried this, thinking it was a genius idea:

Fail-afel muffins!
...and I tried this - making falafel-balls in my hands and slamming them onto a cookie sheet to make patties (which was a LOT of fun!):


Both efforts failed miserably. When I attempted to remove them from the muffin tin/cookie sheet, they completely fell apart because the middle was so soft. I salvaged what I could, and tried the more traditional pan-frying method with what was left.


These looked authentic, but still completely fell apart on removal from the pan, as the middle was still completely soft. Even the fried outsides were deceptively un-crispy. I ate a few of them with some store-bought yogurt sauce, but they were mushy and awful. I'm sorry to say, most of the results of this effort ended up in the trash.

I have some ideas for how to make this recipe better and will be trying it again in the future. If I ever successfully make falafel, I promise to post the recipe. In the meantime, any suggestions are greatly appreciated.

Vegetarian Taco Dip - A Night at the Oscars

Last Sunday I attended an Oscar-watching party that had multiple vegetarians on the guest list. The host planned an all-vegetarian menu for the occasion. I took this as the perfect opportunity to try out this vegetarian taco dip recipe, originally obtained from a good friend and former coworker.

You can substitute a pound of cooked ground beef instead of veggie crumbles if the word "vegetarian" scares you, but I promise this tastes amazing without the meat. To quote my meat-eating boyfriend, "If you hadn't told me this was vegetarian, I never would have known." He encouraged me to make this recipe as often as possible. Other party attendees were big fans of this dip as well.


Ingredients:

1 12-oz package Morning Star Veggie Crumbles
1 package taco seasoning (I used Trader Joes brand)
1 16-oz can vegetarian refried beans ("Fat free" often means vegetarian in this product)
1 8-oz package reduced fat cream cheese (freeze for 15-20 minutes)
1 16-oz jar of mild salsa
1 small can sliced black olives
1 small jar sliced jalapenos
1 bag Mexican grated cheese blend
Olive oil

Preheat oven to 350 degrees. Heat 1 T olive oil in a frying pan over medium heat. Add frozen veggie crumblers, cooking over medium heat until hot and cooked all the way through. Stir often to prevent burning. Remove from heat and mix in the packet of taco seasoning. Feel free to add hot sauce or chili powder if you really like extra heat.

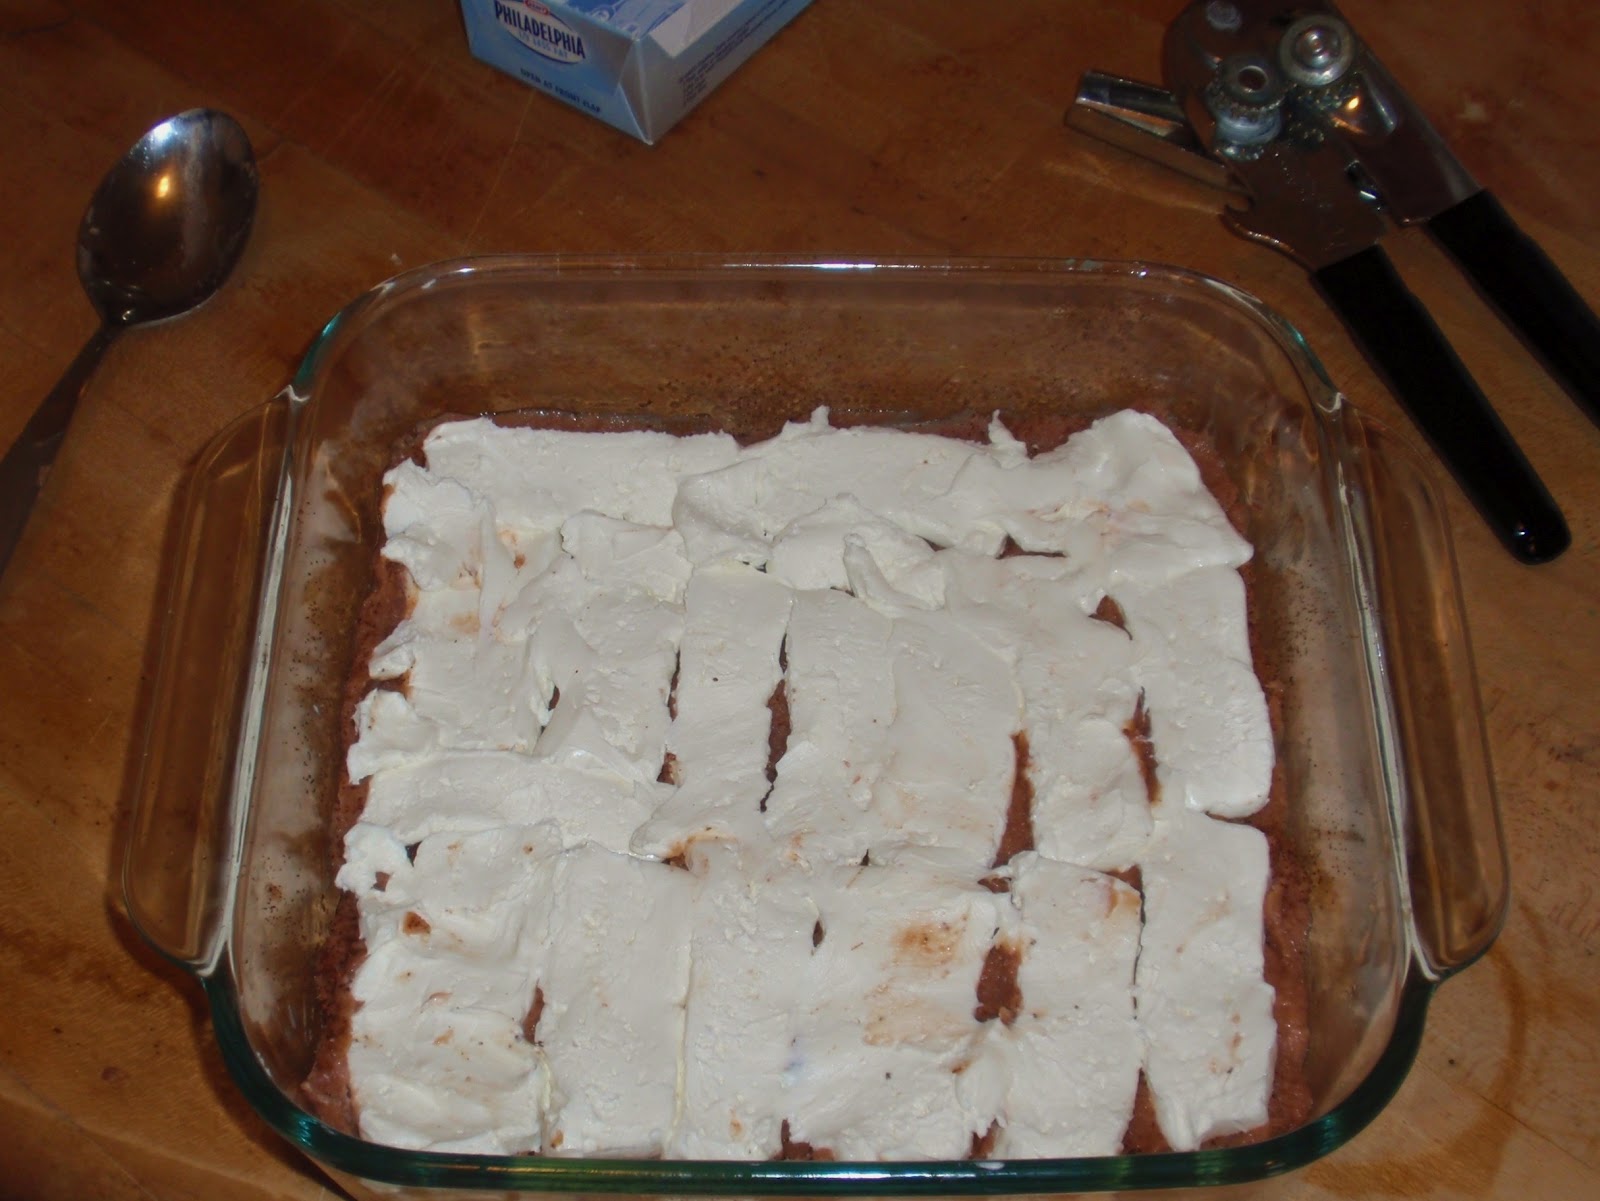
Grease a 9x9 pan with a very small amount of olive oil. Spread refried beans in bottom of pan, using a spatula or spoon to form an even layer. Remove cream cheese from freezer and slice into thin slices (about 1/4 inch). Place these slices on top of the beans, trying to create a full layer of cream cheese.


Spread the whole jar of salsa on top of the cream cheese, again using a spoon or spatula to create an even layer. Spread the seasoned veggie crumblers on top of the salsa. 

Arrange slices of olives and jalapenos as the next layer, keeping in mind how spicy jalapenos (don't go overboard!). I like to chop the jalepenos into smaller pieces to spare party guests from a shockingly spicy bite. Sprinkle grated Mexican cheese on top, using as much cheese as you want.


Bake for 350 degrees for 30 minutes. This dip is best served warm with tortilla chips.

Saturday, February 25, 2012

Cucumber Salad

This recipe was inspired by a local restaurant, Istanbul Grill (http://www.grillistanbul.com/), that makes a delicious cucumber salad. We often order takeout from this restaurant for lunch at work. Istanbul Grill has an incredible vegetarian menu that has given me lots of ideas for vegetarian recipes. This is my personal take on the Turkish cucumber salad.

Ingredients:

2 cucumbers, peeled and cubed
1 cup tomatoes, cubed
1 red pepper
1 avocado
1/2 cup fresh parsley, minced
1/2 cup fresh cilantro, minced
6 ounces plain fat-free greek yogurt (1 small container)
1 T balsamic vinegar
1 T olive oil
1 t salt

*The traditional cucumber salad also includes one diced red onion, but I am not the biggest fan of raw onion, so I left it out.

This recipe is best made with all fresh ingredients. The crispiness of the fresh vegetables is one of it's best features. Chop cucumbers, tomatoes, and red pepper into similar-sized small pieces/cubes. Cut avocado in half and remove pit. Being careful not to slice through the skin, slice a checkerboard pattern into each half of the avocado. Remove avocado from the skin using a large spoon, and you should end up with pieces about the same size as your other cubed vegetables. Mix cucumbers, tomatoes, red peppers, and avocado together in a mixing bowl and set aside.

In a separate bowl, combine parsley, cilantro, yogurt, vinegar, olive oil, and salt, and mix well. Today I used a jalapeno balsamic vinegar from Great Lakes Olive Oil company, a store in Frankenmuth, Michigan, that has a wide variety of delicious flavored olive oils and vinegars. I LOVE this company, and I'm sure you'll hear me mention them again. See http://www.greatlakesoliveoil.com/ if you are interested in more information.

Add yogurt and spice mixture to veggies and mix well until all pieces of vegetables are coated in yogurt. This salad can be eaten plain, or in a tasty wrap with falafel, hummus, and/or your favorite meat. When I am eating meat, I like to add it to a doner kebab (similar to a gyro) from the restaurant mentioned above.

Thursday, February 23, 2012

Delicious Vegan Split Pea Soup

You will not believe how good this soup tastes. I can hardly believe there's not meat in it. Even if I go back to meat eating in the future, I'll probably still make this soup because it's ridiculously tasty and still good for you.


The recipe was adapted from two split pea soup recipes from The Moosewood Cookbook, by Mollie Katzen, and Skinny Bitch in the Kitch, by Rory Freedman and Kim Barnouin. This would have easily made 6-7 pints of soup, but silly me didn't plan ahead and ran out of lids. Instead, I froze some of the soup in 2-cup glass storage containers that are surely going to pop their lids in the freezer. Lesson learned.


Ingredients:


3 T olive oil
4 cloves garlic, minced
1 white onion, diced
3 stalks celery, diced
2 cups carrots, diced
1 ½ t sea salt
2 t oregano
¾ t black pepper
1 t dried mustard
10 cups vegetarian broth
1 lb. split peas
1 t Bragg’s liquid aminos
1 bay leaf


Heat olive oil in large sauce pan or dutch oven. Add garlic and sauté for one minute. Add onions, celery, and carrots, cooking over medium heat until onions and celery are soft. Stir often. Mix in salt, oregano, black pepper, and mustard, and remove from heat.


Never have I cried so much from onions as I did today - WOW this one was pungent!


Add vegetable mixture, broth, peas, and liquid aminos to slow cooker and mix ingredients together with a large spoon. Add 1 bay leaf. Cook for 6 hours on low heat.


After 6 hours, carefully fish out the bay leaf and discard. Stir soup well to mix everything that has settled to the bottom. This makes a lot of soup, so I highly recommend canning or freezing some for future use.


**If you would like to can your soup: Sterilize jars and lids in boiling water before cooking is completed. Turn off slow cooker after 6 hours, stir, and immediately ladle soup into jars, filling to brim. Wipe tops of jars clean before tightly sealing the lids. The canning process must go very quickly; if soup is allowed to cool, the jars will not seal and will not be safe to store at room temperature.


After about an hour, you should hear a “pop” as the button on the lid pops down. This indicates the jar is now sealed and safe to store in the cupboard. If the button on the lid remains raised after 1.5 to 2 hours, this jar is not going to seal. Refrigerate any unsealed jars and eat within 24 to 48 hours.

Wednesday, February 22, 2012

Vegetarian Mushroom Soup

Today is day one of my vegetarian experiment. I had an adventurous day of grocery shopping, tracking down certain rare ingredients across the east side of Cleveland. It turned out that Whole Foods was the only place I could find things like amino acid supplements, vegan cheese, tahini, and a colorful variety of lentils. When I got home, I adapted the following recipe from the Hungarian Mushroom Soup in one of my favorite cookbooks since childhood, The Moosewood Cookbook by Mollie Katzen. The soup took about an hour from start to finish and makes 3 pints of soup.


Ingredients:


2 T butter
1 T olive oil
1/2 T minced garlic
1 white onion, diced
1 1/2 to 2 lbs baby portabella mushrooms, sliced thin
1 t salt
3 t dried dill
1 T paprika
2 t lemon juice
1 cup dry white wine
3 T flour
2 cups water
1 cup milk (at room temperature)
black pepper
1 t Bragg's liquid aminos
1/2 cup sour cream
1 T parsley


Melt butter with olive oil in dutch oven over medium heat. Add garlic and sauté for a minute or two. Add onion and sauté on medium-high heat for a few minutes (about the time it takes to wash and slice the mushrooms). Add mushrooms, salt, dill, and paprika, and mix well. Reduce heat to medium, cover, and cook for 15 minutes, stirring often.


Turn heat back to medium-high, and add lemon juice and wine. Cook for about 5 minutes, stirring often. Add flour in very small amounts, stirring well to avoid lumps. When all flour is mixed in, add water. Cover, reduce heat to medium, and cook for 10 more minutes, stirring often.


Stir in milk. Add Bragg's liquid aminos, a vegetarian supplement that tastes similar to soy sauce and adds necessary amino acids that may be lacking in a vegetarian diet. Add sour cream, stirring in vigorously with a wire whisk until no lumps of sour cream are visible. Add salt and pepper to taste. Add parsley last, and remove from heat. If desired, you can save the parsley until just before serving and add on top of each bowl of soup for a nicer presentation.


**If you would like to can your soup: Sterilize jars and lids in boiling water. At end of cooking, heat soup until just starting to bubble. Turn off stove and immediately ladle soup into jars, filling to brim. Wipe tops of jars clean before tightly sealing the lids. The canning process must go very quickly; if soup is allowed to cool, the jars will not seal and will not be safe to store at room temperature.


After about an hour, you should hear a “pop” as the button on the lid pops down. This indicates the jar is now sealed and safe to store in the cupboard. If the button on the lid remains raised after 1.5 to 2 hours, this jar is not going to seal. Refrigerate any unsealed jars and eat within 24 to 48 hours.

Sunday, February 19, 2012

Roasted Red Peppers

I have found that roasted red pepper are a good way to make almost any dish more interesting. I especially like to add them to scrambled eggs, sandwiches, and those easy pasta meals that come in a box. Yesterday I had a taste for quinoa, but needed to spice it up a little. I made an easy Near East box of quinoa, and made these easy roasted red peppers while it was simmering.


Preheat oven to 450 degrees.


Slice 1-2 sweet red peppers into long, thick slices. Arrange these slices to form only one layer on a baking tray. Drizzle with olive oil, mixing with your hands to make sure peppers are coated. Bake for 10 minutes at 450 degrees, then turn up to broil for 2-3 minutes, watching closely to make sure they don't burn.


By the time your peppers are done roasting, the quinoa should be done. Mix the peppers into the quinoa just before serving. Salt and pepper to taste.