Sunday, November 24, 2013

Pasta Cooked in Red Wine


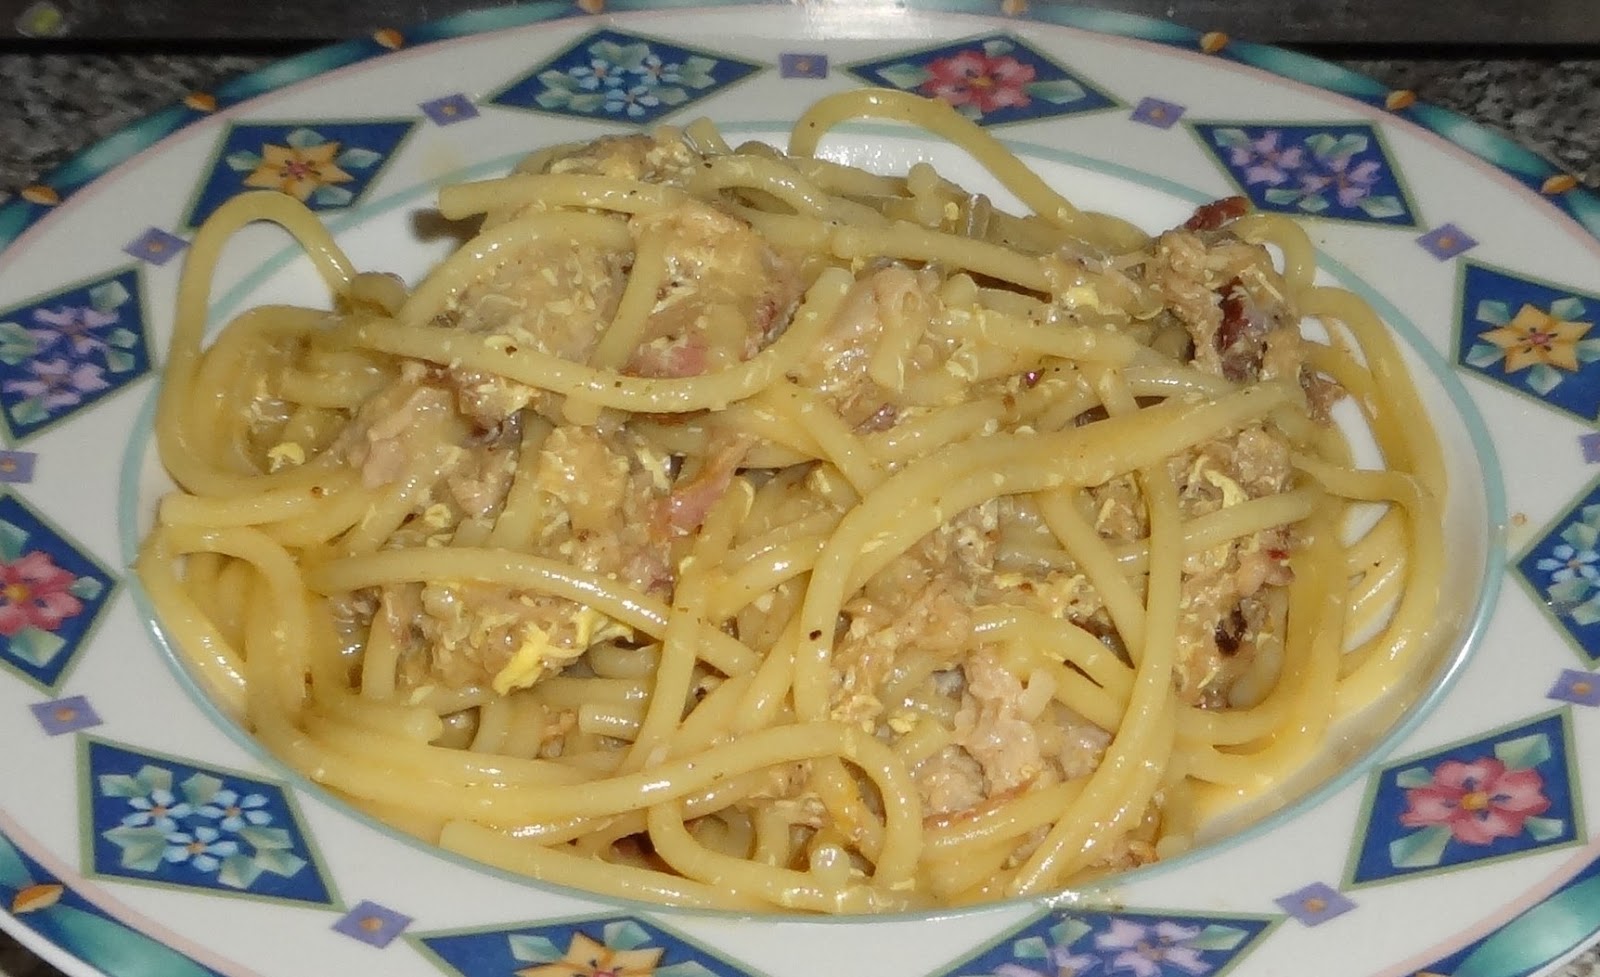
Inspired by Rachael Ray on Iron Chef last night (Battle Cranberry,) and with a request to make my famous meatballs, I tried something new tonight: spaghetti boiled in red wine instead of water.

The resulting pasta was pretty tasty even without any sauce, but definitely had a "different" taste. James ate this purple pasta with normal tomato sauce, meatballs, and Parmesan cheese, and it was fantastic.

Not wanting wine to go to waste, I used the residual boiled red wine to make a garlic butter sauce. The sauce didn't mix well with the meatballs (very different flavors), but went well with the pasta alone.


Ingredients:

1 bottle red wine (I used a cheap-ish Cabernet)
2 cups water
16 oz uncooked spaghetti (1/2 box)
*Use less water if you are not cooking the whole box.

Sauce:
1/2 stick butter
2-3 cloves garlic, diced
1/2 cup reserved boiled red wine from cooking pasta
Salt to taste

Bring wine and water to boil in a large saucepan, salting lightly as you normally would for pasta sauce. Cook pasta according to directions on box, stirring frequently. The sugar in the red wine makes the pasta stickier and easily gets stuck to the bottom of the pan if you space out and forget to stir (as, of course, I did). When you drain the pasta, reserve at least a half a cup of wine for the sauce.

While the pasta is cooking, peel and dice the garlic. Melt 1/2 stick of butter in a large saucepan. Add garlic and cook on low heat, stirring almost constantly or the garlic will burn. The butter will be boiling and foaming. Add a little olive oil if you need more liquid. Cook until mixture just begins to brown - no more, or it will burn.

Add 1/2 cup of wine and mix well. The sauce will thicken quickly, as the wine now has starch from the cooked pasta. Add pasta, mixing until covered. Continue cooking on low until sauce is thickened to your liking. Remove from heat.

Serve to your most adventurous friends - this recipe is fun, but I wouldn't recommend it for picky eaters!

Thursday, October 31, 2013

Pumpkin Pie Martini

Happy Halloween everyone! The holiday in my neighborhood was weakened by pouring rain and gale-force winds this year. While bored waiting around for trick-or-treaters to come to our door, we accidentally came up with this fantastic martini recipe. Enjoy!


4 shots Bailey's Irish Creme
2 shots pumpkin vodka
3 T pumpkin purée
1 t honey
1/2 t pumpkin pie spice 
2 ice cubes

Put all ingredients in blender and blend well. Makes 2 martinis.


Sunday, October 20, 2013

Apple Nut Cake


I was craving an apple fritter on a lovely autumn Sunday and couldn't bring myself to drive 20 minutes away to my favorite apple orchard (http://www.pattersonfarm.com/) when I knew I had all the ingredients and talent to make an apple cake at home.

I know this sounds crazy, but when I was 8 years old I won Best in Show in a baking contest (against adults!) with an apple nut cake. Hoping to recreate this awesome cake, I ransacked my kitchen (which admittedly still has a few boxes from moving 6 months ago) and could not for the life of me find my old award-winning recipe.

A little research found a similar recipe in my Southern Living Cookbook. Adapted to be very slightly healthier, this recipe was delicious and definitely put me in the mood for cooler weather and colorful leaves. It has quickly become a favorite in my house and I have already been asked to make it again.


Ingredients

½ cup (one stick) butter, room temperature
2 cups sugar
2 large eggs, room temperature
1 t vanilla extract
1 cup all-purpose flour
1 cup whole-wheat flour
1 t baking soda
½ t salt
2 t cinnamon
½ t nutmeg
4 apples*
1 cup walnuts, chopped

*A note on choosing apples for baking: I like to use a 50-50 mix of green Granny Smith apples and tart red apples. For this recipe I used Fuji as my red apples, but Gala, Pink Lady, Melrose, and Jonagold all have a similar tart flavor. NEVER use Red Delicious apples for baking; they do not have enough flavor and your baked goods will be terribly boring.

Directions

Preheat oven to 350 degrees.

Peel and cut up four apples. This should give you about four cups of apple pieces.


Stir together butter, sugar, eggs, and vanilla in a large mixing bowl and set aside.

Sift together both types of flour, baking soda, salt, cinnamon and nutmeg until well blended. Slowly add dry ingredients to above wet ingredients, stirring until mixed well. Fold in apples and walnuts. The resulting mixture will be VERY thick, resembling cookie dough.


Spread dough into a non-stick or greased glass 13 x 9 pan. Bake at 350 degrees for 45 minutes, or until a knife inserted in the center comes out clean. Allow cake to cool on a wire rack.


This cake is best served warm, and I swear the taste got even better the next day as the moisture from the apples permeated the cake.

References:

"Chunky Apple Cake with Cream Cheese Frosting." Southern Living Cookbook. Birmingham, Alabama: Oxmoor House, 2006. 154.

http://www.food.com/recipe/apple-nut-cake-60893

Monday, February 25, 2013

Rosemary Buttermilk Biscuits

Today I realized that somehow, despite snow and freezing temperatures over the last few months, my rosemary plant from last summer is not only still alive, but thriving. I was already planning on making soup for dinner tonight, so I started searching through my cookbooks for a simple biscuit recipe that would use up some of the rosemary. These biscuits were fantastic, and I have a feeling I will be making them often in the future.

Ingredients:

2 ½ T olive oil
2 cloves garlic, minced
1 t ground black pepper
1-2 T diced fresh rosemary (use half as much if dried)
2 cups unbleached all-purpose flour
2 t baking powder
½ t salt
½ t baking soda
2 T cold butter
¾ cup buttermilk*

*If you don’t have buttermilk on hand, you can substitute milk and vinegar at the ratio of 1 cup milk to 1 tablespoon white vinegar. For this recipe, I combined ¾ cup milk with ¾ teaspoon of white vinegar.

Preheat oven to 425 degrees.

Heat olive oil in a frying pan. Add garlic, pepper, and rosemary and sauté for a few minutes, stirring often and being careful not to burn the garlic. Remove from heat.

I wish I could somehow post the smell of this fragrant home-grown rosemary.
Combine flour, salt, baking powder and baking soda in a bowl. Stir with a fork until mixed well so that you do not end up with chunks of nasty baking soda surprise in your baked goods (something my grandma was known for, unfortunately). Cut in cold butter using a pastry cutter or a fork. This is easier if you cut the butter into small cubes first. Add oil and spices from pan and mix well, again using pastry cutter or a fork.

Add buttermilk and mix well until dough forms a ball. Move dough to a lightly floured surface and slice into 8 equal pieces with a sharp knife. Form each piece into a rough ball and arrange on a non-stick baking sheet. Brush tops with olive oil.


Bake at 425 degrees for 12-15 minutes, or until brown on top. These biscuits go well with my Herbed Carrot Soup.

References:
The Moosewood Collective. “Biscuits à la Focaccia.” Moosewood Restaurant New Classics. New York: Clarkson Potter/Publishers, 2001. 392. Print.

Herbed Carrot Soup


This recipe originally came from The Moosewood Cookbook, a cookbook that was my introduction to vegetarian cooking. My older siblings brought home this cookbook when I was in elementary school, and we all immediately fell in love with these flavorful recipes from the Moosewood Restaurant, a vegetarian restaurant in Ithaca, New York. Since then, Moosewood has released several more cookbooks and the entire collection remains a family favorite.

This particular recipe has been altered slightly from the original and is something I make at least once a month. It is a very simple recipe to make, especially since I recently bought an awesome new Ninja blender that can puree this entire recipe at once.


Ingredients:

6 cups vegetable broth
2 lbs carrots
1 T butter or oil
1 cup diced onion
1 ½ t salt
2 cloves garlic, minced
½ t thyme
½ t marjoram
1 t basil
1 T lemon juice
1 ½ cups coconut milk

Bring vegetable broth and carrots to a boil in a large saucepan or Dutch oven. Simmer for 20-30 minutes to soften carrots. When carrots are close to being done, heat oil in a frying pan and sauté onions for 5 minutes. Add garlic and herbs and cook for a few more minutes. Stir in lemon juice and remove from heat.

Combine carrots and herb-onion mixture in a blender or food processor with some broth and blend until smooth, working in small batches as your blender allows. Repeat until all ingredients have been blended. I find it is easiest to use a slotted spoon to make sure all carrots have been removed to the blender.

Return blended mixture to pan. Add coconut milk and continue to heat on low for a few minutes, stirring often to avoid burning. This recipe makes at least six servings and goes well with my rosemary buttermilk biscuits.

References:
Katzen, Mollie. “Herbed Carrot Soup.” The New Moosewood Cookbook. Berkeley, California: Ten Speed Press, 2000. 23. Print.

Thursday, October 25, 2012

Pumpkin Soup

Two things take over my taste buds this time of year - the desire for a warm, comforting bowl of soup, and the desire for PUMPKIN-FLAVORED EVERYTHING. Today I combined those two desires in this delicious pumpkin soup. This recipe is non-dairy, but real milk or half-and-half could easily be substituted for the coconut milk that I used. I do, however, think the coconut milk added a flavor that would be missed if you used cow's milk.


Ingredients:

4 cups vegetable broth
1 cup carrots, chopped
1 15-oz can pumpkin
1 can (1 3/4 cups) coconut milk
1 t cinnamon
1 t ginger
1 t salt
1/2 t black pepper
1 bay leaf

2 cups water
Fresh sage for garnish

Combine broth, carrots, pumpkin, coconut milk, carrots and spices (except sage) in large pot and bring to a boil. Reduce heat to low and simmer for at least an hour, stirring often to prevent burning. If you are using regular milk, save it and wait until close to the end of cooking to add it.

After an hour has passed, remove the bay leaf and discard. DO NOT FORGET TO REMOVE THE BAY LEAF. You do not want it blended in with your soup. Strain carrots from soup and add carrots to blender with 2 cups of water. Blend until smooth. Add carrot mixture back to the rest of the soup. If you are using regular milk, this is a good time to add the milk. Heat until just bubbling, then remove from heat. 

Serve garnished with diced fresh sage and with fresh, crusty bread on the side. I found beer bread went perfectly with this recipe. I only wish I had some pumpkin beer for making the beer bread, but alas, we drank it all recently during a particularly bad Browns game.

References:
http://www.againstallgrain.com/2011/11/01/paleo-and-scd-pumpkin-soup/

Saturday, October 20, 2012

Dairy-Free Berry Gelato

This recipe has been a favorite of mine the last few weeks. I always crave ice cream when I don't feel well (I'm sure some of you can relate), but since we think dairy might be causing my migraines, ice cream is an unfortunate no-no. I started munching on frozen berries as an alternative, and eventually this recipe was born.


Ingredients:

2 cups frozen berries (I prefer raspberries)
1/2 cup vanilla almond milk
1 T flaxseed oil

Combine all ingredients in a food processor or blender and puree until smooth. Eat immediately. I must admit, I've been known to remove the blade and eat this directly from the food processor (unplugged, of course).

You can leave out the flaxseed oil if you don't have it, but I find it adds something to the flavor that definitely wasn't there when I was just using berries and almond milk. I think it adds that creamy, fatty flavor that real ice cream has.

Friday, October 19, 2012

Almond Milk

I haven't been blogging lately due to some health issues. I went on a pretty strict diet for a few weeks to try to identify what was causing my headaches. Initially, I thought this meant no fun food at all, but of course I eventually found ways to be creative in the kitchen despite my new-found dietary restrictions. Look for an abundance of healthier and/or dairy-free recipes to follow.

My first fun dairy-free foray was to make my own almond milk. The store-bought brands are chock full of ingredients I can't pronounce, and I'm trying to avoid processed foods like that right now. A little internet research helped me realize that almond milk is insanely easy to make. After a few weeks of trials, I have perfected this recipe as a safe, yummy, easy alternative to cow's milk.


No, the cookie isn't dairy-free... but at least it was homemade!
Ingredients:

1 cup unsalted almonds*
3 cups water
1/4 cup honey**
1 t vanilla

* I know almonds can be expensive. I found the bulk trail-mix section at Whole Foods to be the cheapest option for almonds in my neighborhood.
** I am lucky enough to have a brother with bees who provides me with awesome honey. For those of who aren't that lucky, I recommend finding a local honey at a farmer's market or higher-end grocery store. It's worth the extra money.

Soak almonds overnight in enough water that they are covered.

After soaking overnight, drain and rinse almonds. In a blender, combine almonds, honey, vanilla, and 3 cups of water, and blend for a few minutes until there are no large chunks of almonds left.


Use a strainer or cheesecloth to separate the liquid from the almond meal. I pour the milk into a strainer over a bowl and let it sit for a few minutes to drain. Store in a quart jar in the refrigerator. Use within 48 to 72 hours (never a problem in my house; I drink it all within 24 hours!).

The leftover almond meal can be used for other recipes. Apparently there are also special cheesecloth bags made specifically for making your own nut milk, but I haven't taken time to look for these yet.

References: 
http://www.choosingraw.com/raw-101-homemade-almond-milk/
http://thisiswhatwemade.blogspot.ca/2012/03/almond-milk-vanilla-almond-milk.html
http://naturesnurtureblog.com/2012/06/08/homemade-almond-milk-almond-meal/

Wednesday, September 26, 2012

Shrimp and Red Pepper Bisque

My cousin Rebecca sent me a recipe for roasted red pepper soup and asked me to give it a try. I thought it sounded a little bland (sorry Rebecca!), so I spiced it up a little and ended up with this flavorful dish. I knew it was a success when James went back for seconds.

This recipe could easily be made vegetarian by leaving out the shrimp.


Ingredients: 

5 red bell peppers
4 cups chicken or vegetable broth
1 lb cheese or spinach tortellini
1 t sugar
1 t smoked paprika
3/4 cup half and half
1/2 cup grated Romano cheese
1 cup basil, loosely chopped
1 T olive oil
1 1/2 T Cajun spice mix
1 lb shrimp, peeled and veined


The most difficult part of this recipe is roasting the red peppers. The goal is to roast the peppers on a grill or under the broiler until they are partially blackened on all sides. In my stove, this took about three minutes per side, turning the peppers with tongs every three minutes until all sides were blackened and wrinkly.


Immediately place the blackened peppers in a paper grocery bag, clamping the bag shut and leaving to steam for 10 to 15 minutes. I used a pair of hemostats to clamp it shut (you'd be amazed how much these come in handy in the kitchen), but I suppose a clothespin would do if you don't have access to hemostats.

Remove stems, seeds, and skins from peppers. I found it was easiest to pull a chair up next to the trash can for this. The stems pulled off easily, and the seeds and skin are easily scraped and pulled off if you cut the peppers in half lengthwise. Slice one of the peppers into thin strips and set aside. The other four peppers will be used for the main content of the soup.


Bring broth to a bowl in a large pot. Add the four unsliced peppers and cook for five minutes. While peppers are cooking, combine shrimp, one thinly sliced pepper, olive oil, and Cajun spices in a bowl and mix well. Heat a frying pan to medium-high heat and add this mixture to frying pan to sauté, stirring occasionally, while you work on the rest of the soup.


Not the most appetizing step in the meal - raw shrimp isn't pretty.
When peppers have cooked in broth for five minutes, remove peppers and some of the broth to a blender and puree until smooth. Repeat this until soup is one uniform texture and no chunks of pepper remain. Return pureed red peppers to soup pot and bring to a boil. Add sugar and paprika and mix well. Add tortellini and cook for 10 minutes, or until tortellini is soft.


When tortellini is cooked, add grated Romano cheese and stir until melted. Add half and half and basil, stir until mixed, and remove from heat. When shrimp is cooked through (opaque and easily cut), add shrimp mixture to the rest of soup and stir until mixed.

Serve hot with a dry white wine. Serves four to six people... or two if you live with a guy who just got home from the gym.


References:
http://www.epicurious.com/recipes/food/views/Roasted-Red-Bell-Pepper-Bisque-with-Shrimp-and-Romano-Cheese-103119
http://www.foodrepublic.com/2011/11/04/how-make-roasted-red-peppers

Pancetta Gnocchi

This is a twist on an old family recipe. Gnocchi was a favorite meal of my grandpa, Walter Rozanski, who is pictured below making it. His daughter, my aunt Rita, requested that I figure out how to make bacon gnocchi, and this recipe was born.


(On an unrelated note, I just discovered where my nose comes from!)

Gnocchi ingredients:

2 medium potatoes
1 egg
1 1/2 cups flour
1/2 cup grated Romano cheese
1/2 pound pancetta (Italian bacon)

Alfredo sauce ingredients:

Fat from cooking pancetta
1 T butter
3 cloves garlic, minced
1/4 cup dry white wine
1 1/2 T flour
1 cup milk
1/2 cup grated Romano cheese
1/2 cup grated asiago cheese
1 t black pepper

Peel, cut, and boil potatoes until soft and easily mashed. On my stove, this took 25 minutes from the start with hot water. Drain water and mash potatoes until smooth. Stir in 1/2 cup grated Romano cheese. Set bowl in refrigerator until cool.


While potatoes are cooling, dice pancetta and sauté on medium-high heat until crispy. Remove pancetta, reserving juice/fat in pan. Set this aside for sauce. Let cooked pancetta cool for a few minutes, then mince/crush until there are no large chunks of meat.


Remove potatoes from refrigerator. Add egg, mixing well with a spoon. Add flour and mix well. Add pancetta last, mixing well.

Fill a large pan half full with water and a few dashes of salt and put on the stove to boil at this point.

Spread some flour on a table or cutting board to prevent dough from sticking. Knead gnocchi minimally until it is a uniform ball of dough. Cut this ball into four pieces. Take one quarter of the dough at a time and roll into a long snake of dough. Using a sharp knife, slice dough into pieces 1 inch wide or less. Take each piece individually and roll on a fork so the sides are grooved. Place gnocchi on a plate to rest while making remaining gnocchi.

When your plate is full and water is boiling, drop the plateful of gnocchi into boiling water and set a timer for five minutes. More gnocchi can be rolled out and sliced while the first batch is cooking. After five minutes, remove gnocchi from water with a slotted spoon and leave to drain in a colander.

Continue above steps until all dough is used and all gnocchi is cooked. Drain water and use the same pan for the sauce. Use a rubber spatula to drain the fat from cooking the pancetta from the frying pan into the larger pan. Heat this fat and one tablespoon butter on medium heat. When butter is melted, add minced garlic and saute for a few minutes, stirring often to prevent burning. After a few minutes, add wine and cook for a few more minutes, again stirring often. Add flour and use a wire whisk to mix well, making a rue. Cook only for a minute or two, stirring almost constantly to prevent burning.

Add milk, again using wire whisk to mix well. Continue cooking and stirring often until sauce starts to thicken. Add cheese about 1/3 cup at a time, mixing until melted. Add pepper last. Stir in cooked gnocchi to coat with sauce. If gnocchi has cooled, cook until warm.


This recipe serves four to six people and goes well with pinot grigio. I think this is one of the tastiest recipes I've ever made, and I plan to make it often in the future.

Sunday, September 23, 2012

Blueberry Coffee Cake

I was recently asked to make a coffee cake for a wedding shower. I was surprised to realize I have never made anything like this, so I was excited to find this recipe online and see that it had excellent reviews. The recipe was a success; it disappeared so quickly at the wedding shower that I wished I had doubled it.


Ingredients: 


½ cup unsalted butter, room temperature

Zest from 1 whole lemon
7/8 cup sugar*
1 egg
1 t vanilla
2 cups flour
2 t baking powder
1 t salt
2 cups fresh blueberries
½ cup buttermilk


* 7/8 cup = 3/4 cup + 2 tablespoons
Before starting, allow butter and eggs to come to room temperature. Tip - if you want to speed up the butter warming from frozen or refrigerated temperatures, slice it into a bowl and it will thaw/soften faster. Putting it in the microwave is not the best idea, as this will effect the texture and fluffiness of your final product.
Preheat oven to 350 degrees.

Toss blueberries with 1/4 cup flour and set aside. Combine remaining flour (1 3/4 cups) with baking powder and salt and mix well with a wire whisk.
Combine butter, lemon zest and sugar and beat until creamy. Add egg and vanilla and beat well until mixed. Add flour and buttermilk slowly, alternating between the two ingredients and mixing well. Add blueberries last, folding into dough with a large spatula or spoon.
Grease a 9x9 pan or similar size pan with butter. Spread dough into pan and sprinkle sugar over the top. Bake for 35 to 40 minutes or until a toothpick inserted in the cake comes out clean. Allow to cool before slicing.

I am also thinking this recipe would make great blueberry muffins too... maybe next time I will try that.

Sunday, September 9, 2012

Cucumber-Cream Cheese Pinwheels

I was notified late Friday night that we (I) needed to make an appetizer for James' company party on Saturday afternoon. These were easy to throw together at the semi-last minute, and fun to make. They were a big hit, and I am proud to say there were no leftovers.


Ingredients:

16-oz cream cheese (at room temperature)
1 lb thin-sliced deli turkey
1 package tortillas
1 cucumber (or 2 cups diced)

Plan ahead to leave cream cheese out of refrigerator for an hour or two before you start. Use fresh, soft tortillas that will not break when you roll them up.

Spread a thin layer of cream cheese on one tortilla, covering with at least an 1/8-inch layer right up to the edges. Sprinkle diced cucumber over the tortilla, covering less than 50 percent of the cream cheese.


Add a thin layer of turkey, ensuring to leave areas of cream cheese peeking through so the ingredients will stick together when you roll up the tortilla.


Starting at one edge, roll the tortilla and all filling very tightly until entire tortilla is rolled up. Repeat these directions until you have used all of the cream cheese and/or tortillas. I used two different flavors/colors of tortilla to make it look pretty, so I only used half of each package.

Wrap 2 to 3 tortilla rolls together in aluminum foil, making sure they stay tightly rolled. Refrigerate for at least one hour before slicing. After an hour, use a very sharp non-serrated knife to slice each roll into 1/2-inch slices. Do not saw at the tortilla with your knife or it will come unrolled.

Each tortilla makes about 8 pinwheels. The inch to two inches at the end of each tortilla are not nice enough looking to serve at a party, so I set these parts aside for pre-party snacks.

References:

Pulled Pork Pasta

This tasty dish was inspired by chef Michael Symon, whose serves a similar dish at his restaurant Lolita here in Cleveland. The original dish is made with a different type of pasta and with diced pancetta, but in my home we decided it is just as tasty and healthier to leave out the bacon.


Ingredients:

1/2 lb. pork roast
1/2 lb. thick spaghetti
2 cups vegetable broth
2 cloves garlic
1 T olive oil
3 egg yolks
1/2 t salt
1/2 t pepper
1 cup grated Romano cheese
1 cup grated Fontina cheese

Combine pork roast and vegetable broth in slow cooker and cook for at least four hours. Drain most of the broth to a separate bowl. Shred pork using two forks, leaving in slow cooker with a small amount of broth on low heat to stay warm.

Cook pasta according to directions. Drain pasta and set aside. Dice garlic and sauté with one tablespoon olive oil for a few minutes in pan used to cook pasta. Add broth and heat until boiling. Separate eggs and stir yolks just enough to break. Add yolks to boiling broth, stirring constantly until mixed. If you care what your food looks like, you can strain the broth at this point to remove the bits of cooked egg white that always sneak through. By this point, I'm usually too hungry to care about straining the broth.

Reduce heat to medium. Add grated cheese slowly, stirring often until all cheese has melted. Add salt and pepper. Add shredded pork and remaining broth, stirring until pork is well covered in sauce. Add pasta last, stirring until mixed well with sauce and pork.

Makes 5 to 6 servings. The sauce is thin, so you may need a ladle to ensure the first few servings get the sauce that may be hiding at the bottom of the pan. This recipe tastes even better after the pasta and pork has had a chance to soak up the flavors in the refrigerator overnight.

References:
http://lolitarestaurant.com/

Sunday, September 2, 2012

Blueberry crepes

As you may have noticed, this year I am spending my Labor Day weekend in the kitchen! I have four days in a row off and it has been so relaxing. The only problem is that I keep creating dirty dishes.

I woke up this morning and immediately thought of the fresh blueberries I bought yesterday. My first instinct was to make blueberry pancakes, but I knew pancakes would result in a carb coma that could lead to a very lazy day. Crepes seemed to be the answer.


Ingredients: 

Filling:
1 pint blueberries
2 t sugar
3-4 T water

Crepes:
2 eggs
6 T all-purpose flour
2 t sugar
1/4 t cinnamon
1/4 t salt
2/3 cup milk or almond milk
2 t coconut oil*

Topping:
1 pint heavy cream
2 t sugar

*Some other sort of oil would probably be OK, but I've always used coconut oil for my crepes for some odd reason.

Combine blueberries, sugar, and a small amount of water (3-4 tablespoons) in a saucepan on low to medium heat. Cover and cook until desired sauce-like consistency (about 5-10 minutes) stirring often. A small amount of corn starch could probably help thicken the berries, but I didn't have any. Leave on low heat and stir occasionally while cooking crepes. Leaving the lid off at this point will also help the sauce thicken as water evaporates.


Make whipped cream before starting the crepes. In mixing bowl, beat heavy cream on high setting until it forms peaks and is whipped-cream consistency. Be careful not to over-beat the cream or you will get butter! Add sugar and mix minimally. Taste the whipped cream to test the flavor; you might like more sugar than I do. Set aside.

Homemade whipped cream is soooo good, and you avoid all those weird chemicals! 
Combine all crepe ingredients in a blender and mix well. Heat a medium-sized frying pan to medium/medium-high heat (on my electric stove, the line between medium and medium-high is the perfect setting for crepes). Allow the pan to heat well before adding batter. Spray a small amount of non-stick spray before each crepe to help with clean and easy flipping.

Add a thin layer of batter to fill the pan, using a large spoon to spread the batter and even out the crepe. Allow to cook until there is no more liquid batter visible.


Use a rubber spatula (not a stiff one that you would use to flip pancakes) to loosen the edges, working the spatula under half of the crepe and flipping quickly. Don't feel bad if your first crepe doesn't flip properly; I ruined a few crepes the first time I made them before I got the technique down.

A perfect flip!
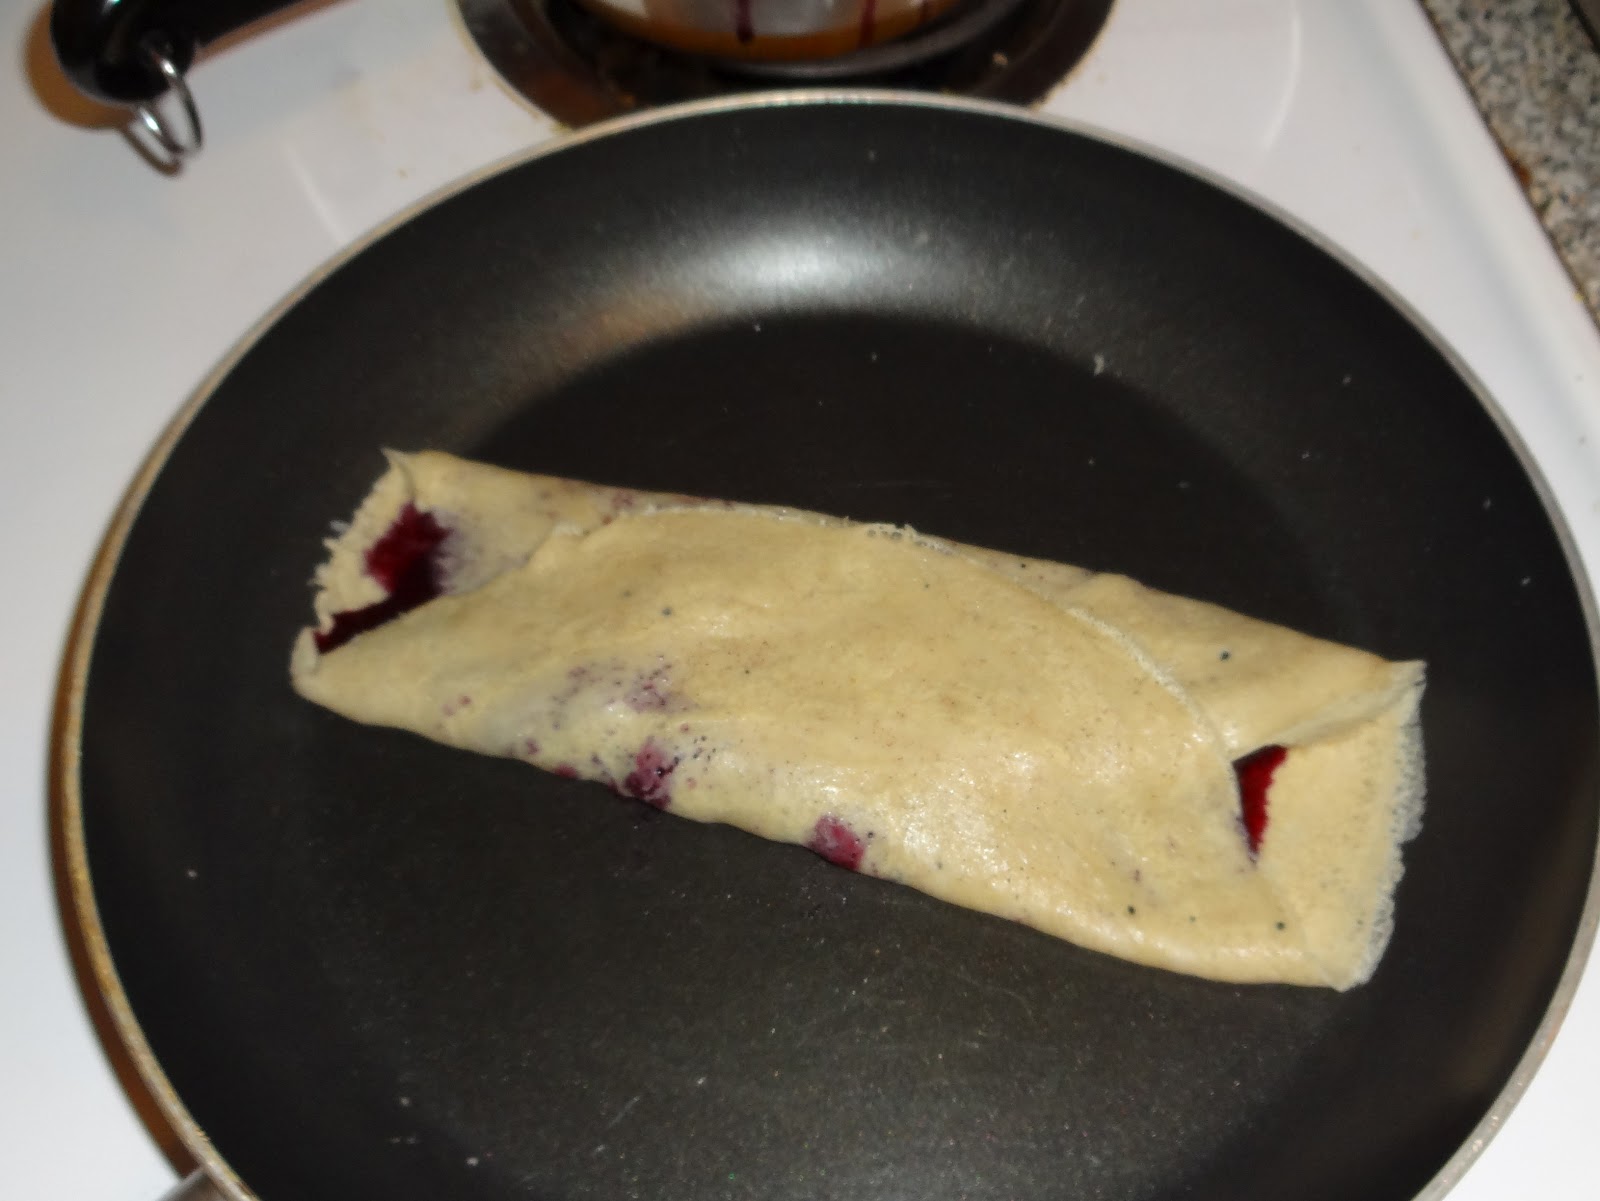
Spoon a line of blueberry filling into the center of the crepe. I strained out some of the liquid because my sauce was a little thin. Use the spatula to fold the crepe in thirds over the berries.


I always find the trickiest part is getting the crepe out of the pan without destroying it. Hold the pan at an angle over a plate, work the spatula under the front edge of the crepe, and slide it onto the plate, using your spatula as a guide.

This recipe makes four crepes. If you have extra batter, cook the crepes without filling and layer with parchment paper in between. Wrap in tin foil to keep from drying out. I'm not sure how long they will last in the refrigerator; mine will certainly not last more than 24 hours because someone will eat them.


Saturday, September 1, 2012

Chocolate-Bacon-Beer Muffins

Yep, you read that right. I can't take credit for this recipe in any way, but I loved it so much that I have to share the experience.

The original recipe can be found here: http://thebeeroness.com/2012/01/24/chocolate-bacon-porter-muffins/ . The only thing I changed was that I used a bock beer instead of a smoked porter, on recommendation of the beer expert at my local grocery store. I couldn't find a smoked beer anywhere in early August, so he recommended this as a comparable beer:

Bonus: I got to drink the leftovers.
I used a good thick-cut smoked bacon to and a little extra smoked paprika to add the smoked flavor that was missing from the beer. My whole apartment smelled amazing while these were baking. I doubled the recipe and yielded 16 delicious muffins. I thought these muffins still hot from the oven could possibly be the most delicious thing I've ever created.


 My boyfriend, however, thought they were "gross." I was shocked. These muffins should be the key to any man's heart. I mean chocolate, bacon, and beer? Come on. How could this be anything but delicious?

After much discussion and taste-testing by other friends, we came to some conclusions about this recipe:

1. It needs more bacon. Not just sprinkled on top, but mixed throughout the batter.
2. If you like dark chocolate, you will love this recipe. If you are more of a milk chocolate fan, you will hate it.
3. I have to learn how to make chocolate-covered bacon.

I will definitely be making this recipe again, only next time I won't double it (since apparently I'm the only one in my home who will eat it) and will add more bacon. I'm looking forward to finding a smoky porter this fall and trying it again.

References:
http://thebeeroness.com/2012/01/24/chocolate-bacon-porter-muffins/